How to setup JaCoCo Code Coverage with Maven Project

JaCoCo is an open-source library created by the EclEmma team for measuring and reporting code coverage in an application. It is quite popular among the variety of code coverage libraries for Java out there.
In this blog, we will be talking about how to set up JaCoCo with Maven Project. To understand JaCoCo’s code coverage capabilities, we need to have a code sample.
Table of Content
Sample Maven Project
Here, we are going to use a simple class named ‘LicensingService’ consisting of a simple Java Function that prints if the user is eligible for a license or not based on the provided age and ‘LicensingServiceTest’ consisting of Unit Tests.
public class LicensingService {

    public void eligibilityChecker(int age) {
         System.out.println("User Provided Age: " + age);
         if (age >= 18) {
              System.out.println("You are eligible to apply for license");
         } else {
              System.out.println("Sorry, you are not eligible to apply for license");
        }
    }

}
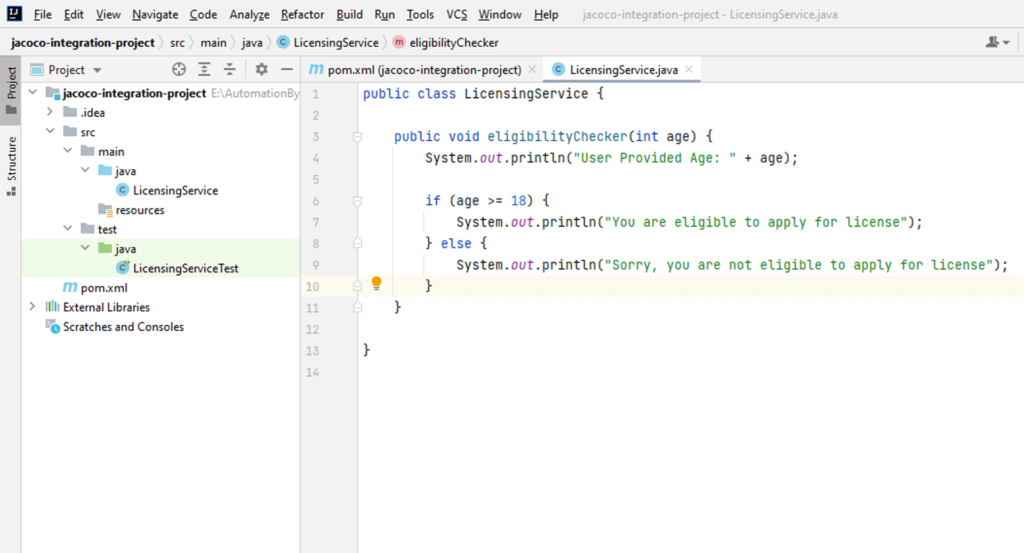
Now, we need to add JUnit Tests against which the coverage will be generated.
public class LicensingServiceTest {

     @Test
     public void licenseEligibilityChecker() {
          LicensingService licensingService = new LicensingService();
          licensingService.eligibilityChecker(18);
     }

}
Configuring Jacoco Maven Plugin
Now to configure Jacoco with the project, we need to declare this maven plugin in our pom.xml file:
<build>
    <plugins>
        <plugin>
            <groupId>org.jacoco</groupId>
            <artifactId>jacoco-maven-plugin</artifactId>
            <executions>
                <execution>
                    <goals>
                        <goal>prepare-agent</goal>
                    </goals>
                </execution>
                <execution>
                    <id>report</id>
                    <phase>prepare-package</phase>
                    <goals>
                        <goal>report</goal>
                    </goals>
                </execution>
            </executions>
        </plugin>
    </plugins>
</build>
The JaCoCo Java agent will collect coverage information when maven-surefire-plugin runs the tests. It will write it to target/jacoco.exec by default. Read more.
Executing the Tests and Creating the Coverage Reports
Execute the Tests using mvn clean test
On execution of tests, Jacoco agent will automatically instrument to the code, thus, it will create a coverage report in binary format in the target directory – target/jacoco.exec.
The generated report can further be interpreted through two different ways.
1. Display Interactive Report in IntelliJ
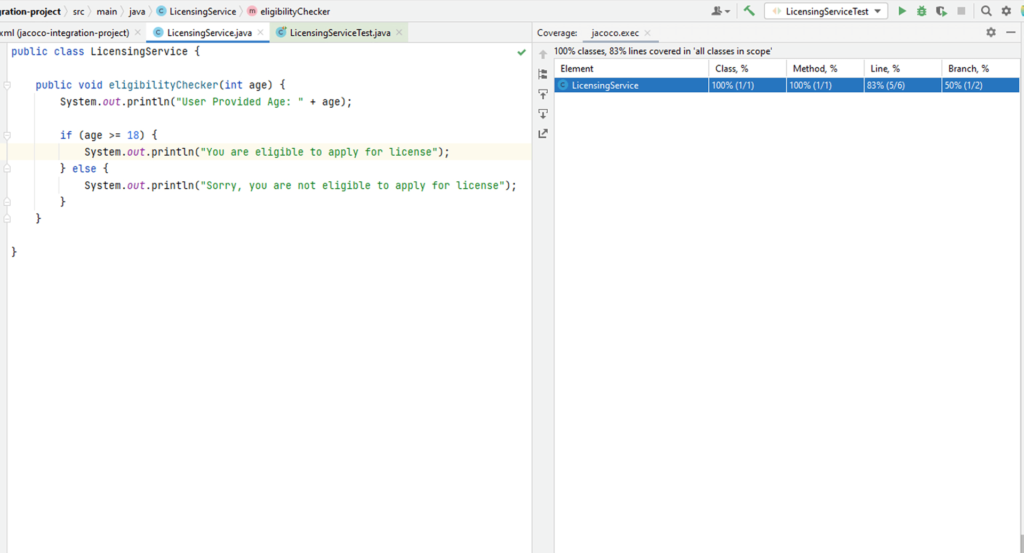
IntelliJ provides an interactive coverage interface that can be utilized to analyze line-by-line coverage of complete code. The jacoco.exec binary file generated after the execution of tests can simply be accessed in the IntelliJ Coverage window using the below steps.
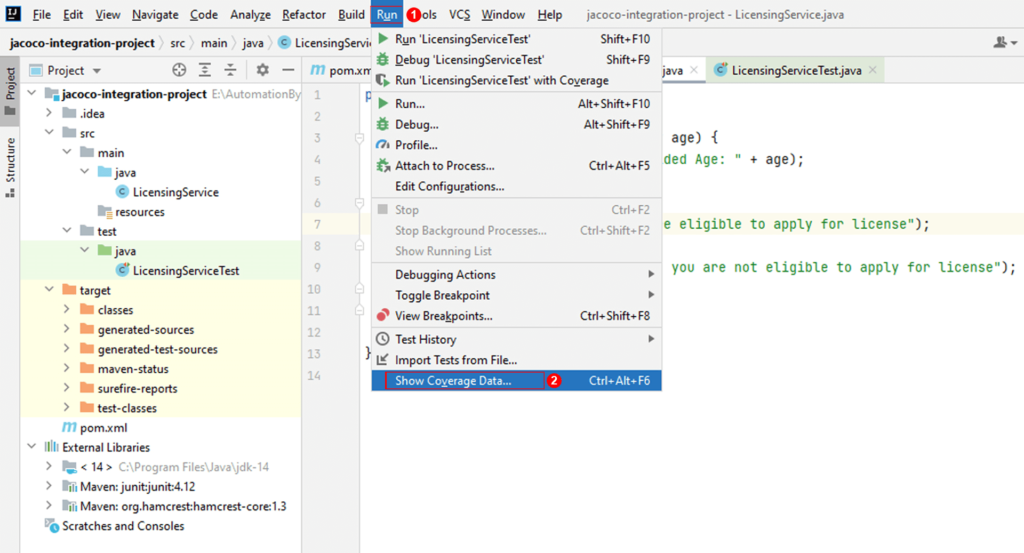
Step 1 – Click on Run -> Show Coverage Data. [Shortcut : Ctrl + Alt + F6]
A new Coverage Suite Dialog box will appear.
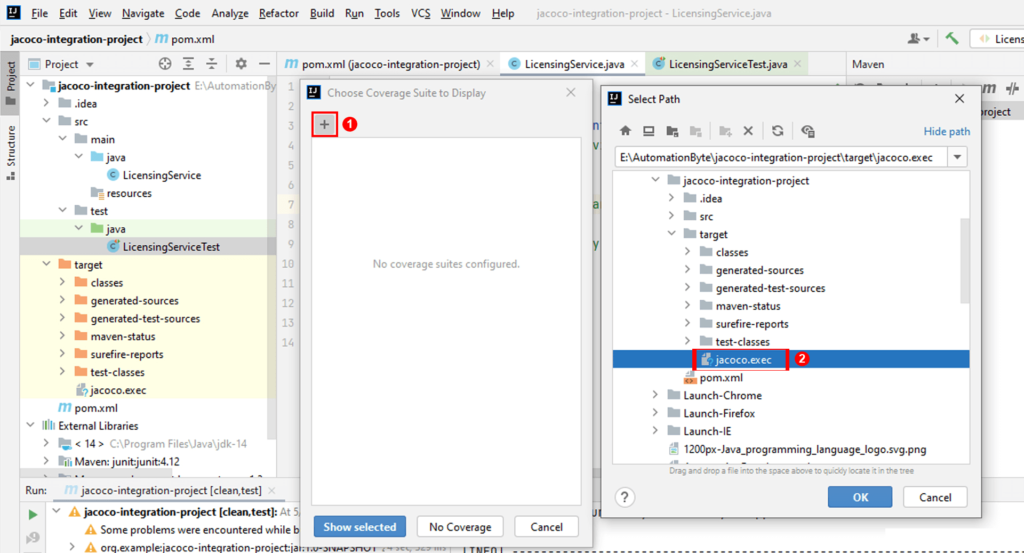
Step 2 – Click on (+) add button in the Coverage Suite Dialog box. Select the jacoco.exec binary file and click Show Selected.
You will now be able to view the line-by-line coverage.
2. Interpret Binary Report to HTML format
The generated jacoco.exec can be interpreted to the HTML, CSV, XML Report format which is human readable. To achieve this, we can simply run the below maven command.
mvn jacoco:report
Please Note: This step can be completely avoided by adding the above goal during the test execution itself.
Example: mvn clean test jacoco:report
We can now take a look at the target/site/jacoco/index.html page to see what the generated report looks like.
