
How to quickly Instrument JaCoCo agent with WebLogic

JaCoCo is an open-source library created by the EclEmma team for measuring and reporting code coverage in an application. It is quite popular among the variety of code coverage libraries for Java out there. If you wish to setup JaCoCo with Maven, you can go through my previous blog which provides a detailed Guide to setup JacoCo Code Coverage Tool with Maven.
Table of Content
In this blog, we will be talking about how to set up a JaCoCo agent on the WebLogic server. To get started, we have a sample License Eligibility Checker application.
Sample Application
For demonstration, we are going to use a simple License Eligibility Checker application consisting of a UI that prints if the user is eligible for a license or not based on the provided age.

Integrating Jacoco Agent with WebLogic Server
JaCoCo uses class file instrumentation to record the coverage data against the test execution. Class files are instrumented on the fly using a so-called Java agent. When a Java agent is attached to the JVM, the agent can see when the class file is called and what lines are executed.
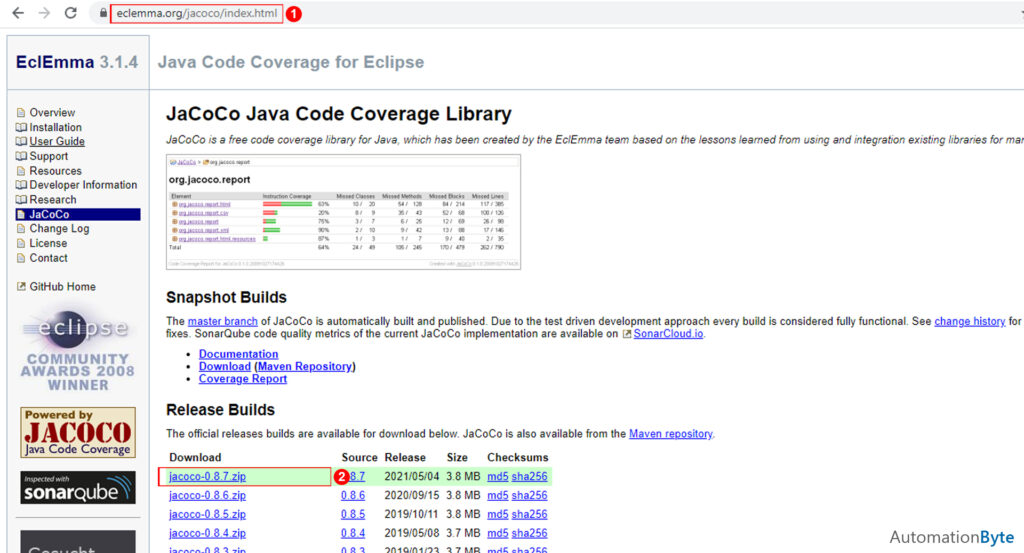
Step 1 – Download the latest JaCoCo distribution from JaCoCo’s official website (https://www.eclemma.org/jacoco/index.html)
Step 2 – Once downloaded, extract the downloaded JaCoCo distribution zip file. You will be able to see multiple JAR’s in the lib folder inside the extracted distribution, which we will be needing in further steps.

Step 3 – Create a new directory inside '<WEBLOGIC_HOME>/user_projects/domains/<DOMAIN_DIRECTORY>/' named ‘jacoco’. Copy the jacocoagent.jar, jacocoant.jar, and jacococli.jar inside the newly-created directory.
Please Note – Creating the jacoco directory inside the above provided path is not mandatory. You can create the directory anywhere according to your convivence. I generally prefer the above path for better maintenance.

Step 4 – We now need to attach the JaCoCo agent with WebLogic JVM. To attach the JaCoCo agent, add the below argument to setDomainEnv.sh (For Linux) / setDomainEnv.cmd (For Windows) file available inside <WEBLOGIC_HOME>/user_projects/domains/<DOMAIN_DIRECTORY>/bin/ directory.
set JAVA_OPTIONS=-javaagent:PATH_TO_JACOCO_AGENT_JAR/jacocoagent.jar=destfile=PATH_TO_GENERATE_JACOCO_EXEC_FILE/jacoco.exec,output=file,append=false
JaCoCo agent is successfully attached to JVM now. When we start the WebLogic server, there should be a jacoco.exec file generated at the provided destination file path.

Please Note – The size of jacoco.exec file is zero initially. On successful WebLogic server shutdown, the Jacoco agent appends the coverage data to an already created binary file.
Converting Binary Report to HTML format
The Java agent generates a Binary file that is not human readable. The file cannot be singlehandedly interpreted. In order to convert the generated binary file (jacoco.exec) we will utilize jacococli.jar. In order to generate the HTML report, perform the following steps:
Step 1 – Create a new directory inside the jacoco directory which we previously created with name ‘reports’. We will utilize this folder to generate the HTML report.
Step 2 – Execute the following jacococli.jar with parameters:
java -jar PATH_TO_JACOCO_DIRECTORY/jacococli.jar report jacoco.exec --classfiles PATH_TO_APPLICATION_CLASS_FILES --html PATH_TO_HTML_REPORT_DIRECTORY
java -jar PATH_TO_JACOCO_DIRECTORY/jacococli.jar report jacoco.exec --classfiles PATH_TO_APPLICATION_CLASS_FILES --html PATH_TO_HTML_REPORT_DIRECTORY


Table of Content Introduction In today’s DevOps-driven world, containerization has become a crucial aspect of deploying applications efficiently. Docker enables…

Setting up Oracle XE in your local development environment can significantly speed up application development by giving you a powerful…